November 13, 2014

Thanksgiving Prep

When I was little we moved into a new house and the next door neighbors where this older couple from Norway, Ellen and Lloyd. They where really sweet folks and had a perfect yard. I would go over and visit once in a while and would stop by to sell girl scout cookies. I remember their house have a very distinctive smell. I never knew what it was, some combination of old people and Norwegian food was what I assumed. Ellen passed away when I was a teenager and Lloyd passed away during my first year of college. I ended up with some of their kitchen stuff, because their niece was the only surviving relative and I was about to move out of my parent's house, so she let pick through things before the estate sale came through. A few pans and their teacups.

I was reminded of them today because I was polishing silver. For our first anniversary my mother-in-law gave us a silver sugar bowl and creamer set that had belonged to my husband's great-grandmother. They were very tarnished. Any other silver I have had in the past has been able to be buffed up with just a silver polishing cloth. These needed something stronger though. So I went to the hardware store and picked up "Wrights Silver Cream." It turns out that the smell of that silver cream is the exact same smell I remember from Ellen and Lloyd's house! This cream worked great and now they are shiny and ready for Thanksgiving!


Very tarnished!

All shiny! You can see me reflection.
We are hosting this year. This is not the first time we have hosted Thanksgiving, but I think this will be the biggest yet. I got all new napkins, I bought these from Pier 1. The napkins we have are starting to look a little worn and I don't have enough to have them all match for the number of people we have coming over.

I have also been working on decor. My plan for the table is to get several big rolls of Kraft paper and cover the table, we've got white napkins and mis-matched white dishes (we only have a set of 8, so I'll be borrowing from my mom who has plain white dishes also) and I want to have some hand drawn labels for food and place cards. I also decided to make a banner. I saw this great saying "Gather here with grateful hearts" on a set of project life cards I ran across on pinterest and I thought it would make a great sentiment to hang above the fire place. I worked out the design on some scrap paper and then traced it onto the Kraft paper. I used the "rub the side of a pencil on the back" method. Simple.


I attached a dowel to the top with hot glue to give it something to hang from.
I've had the paper sitting under a pile of books all day trying to straighten it out. (The joy of cooking and the etiquette book, how appropriate).


So I've got my napkins pressed, the silver is polished and the decorations are nearly done! Now I just need to go shopping and get everything prepped. Good thing I've still got a few weeks!
All done and hung above the mantle! 

October 1, 2014

Green Moneta

This is my green Moneta. I've only worn it once since we have had such a warm fall so far, but I’m looking forward to wearing it with boots and tights as the days cool off. When I first saw the collar variations. I thought the tie collar would look great in a forest green. I searched all over for just the right fabric, I went to three different fabric stores and could not find the right thing, but then just as I was about to leave Mill End empty handed I looked up and there it was on some weird high shelf. I had to get someone to come over and help me. And then, the best part of it all was that it was only $7/yd and it was super wide so I only had to buy two yards!


This went together really quick. I made plans to use my mom’s serger one Sunday. I cut it out one evening the week before and then put it together in a few hours on the serger. I am not a serger expert, so mom helped in a few spots. Attaching the collar was a little tricky since you have to do it in the round, but we figured it out.
I made a few pattern adjustments from my previous Moneta, I narrowed the neckline a little bit (had to make sure to change the collar pattern also) and cut about an inch off the bodice. If I did this again I would probably modify the collar pattern so that it is all one piece, not front and back. This is a pretty thick jersey and the seams look pretty bulky.

I got lots of compliments the one day I did wear it to work, it is always fun to see people’s reactions when I tell them I made something that I am wearing. :)

September 30, 2014

Colette Myrtle

This is my hack of the Colette Myrtle dress. It is a lovely, easy pattern but the fabric I got for it just did not have enough drape and the cowl neckline was not flattering. Instead I gathered the neckline, hacked off a chunk of it and added two small ruffles. I wore the heck out of this dress all summer. It was really lightweight and breathed well.

I have been wanting to take pictures of this dress but haven’t gotten around to it, but then last week my friend posted pictures from her beautiful August wedding and there was this cute one of C and I playing giant jenga. Bingo, dress in the wild. So here you go, not the best picture of the dress ever, but you get the idea, and I get one more un-blogged sewing project off my list.


September 28, 2014

Craft room update

I have been really lucky, the last three houses we have lived in there has been a spare room that I can use for my craft room. Its wonderful to not have to use the dining room table for projects (although I do still use it for cutting out patterns) and then clean up before dinner. I can close the door and leave a project in the middle. But these spare rooms have always had to serve dual purposes, as storage, or a guest room, And to compound the fact that the space is not entirely mine, I have always had to work with hand-me down storage. But just a few weeks ago we made it work so that I could get a new shelf from Ikea. I love it! It has made a world of difference in the craft room and inspired me to make some other changes as well. Let me take you on a before and after tour.

Before
After
My parents gave us a twin futon so that the room can do double duty as a guest room. Before, it was in the way when not in use and hard to get to when it was unfolded. Now it can be out and set up all the time. I can use it as a place to read, or do a bit of hand work (the light is great) and we are ready for guests any time. 
My two, ill-fitting hand-me-down shelves.

Brand new, everything fits Kallax!
I rearranged in order to make the guest bed have a permanent home. The new Kallax is slightly less storage than I had before, but I'm ok with that since it means things are tidier and easier to find. In the process of putting things away on the new shelf I threw out a bunch of things and also moved some stuff to basement. I figured that if I hadn't used it since we moved into our last house I could get rid of it. 
Before
After, doesn't look that much different.
So my actual sewing space hasn't changed that much, but the rest of the room is so much better. The table is my grandma's old sewing machine, unfortunately it needs to be rewired so it is currently not functional, but it make a great perch for my trusty Viking Emerald.  
Let me show you a few more cool things about the new space. 
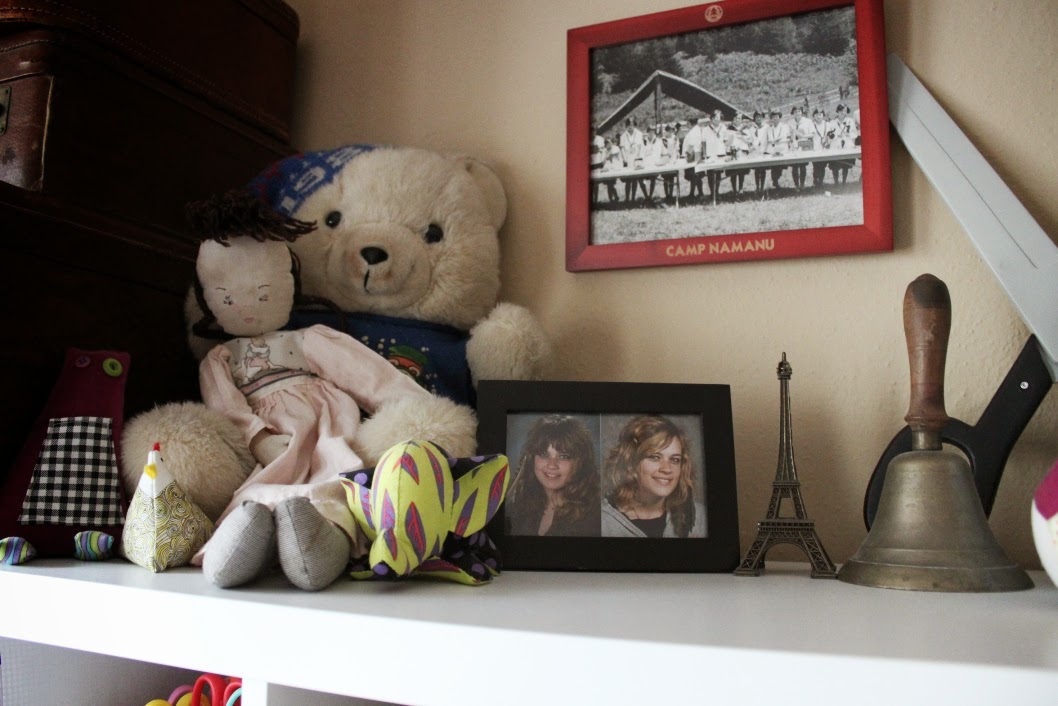
This teddy bear has a hat that says 1988. My uncle gave it to me this spring and told me he bought it for me when I was a baby but then he liked it so he kept it and started a teddy bear collection. He had to get rid of the collection and figured I should have this bear, you know 26 years late. I've also got a few softies I made, my doll from when I was a kid, and the chicken was brought back by some friends who went to Hawaii for their honeymoon. Pictures of my sister, and Camp Namanu. I've got my grandma's old school bell and my giant scissors. It is so nice to have some room to display things. 

The shelves are jam packed. For now I've got the bins I had before. But I would like to get some pretty ones that all match. If you have any recommendations on where to look or specific models, leave them in the comments. I also want to get some nice labels for the bins and the shelves. 

Close up of the guest bed. Doesn't it look nice and cozy? This is a scrap log cabin I made a few years ago. It is super warm, I put two layers of batting, and here it is doubled over. Probably too warm for the fall, but it looks nice and was on the top of the stack of quilts in the closet so it ended up on the bed. I'd like to get a little stool that can be used as a night stand as well. And really long term I'd like to get some kind of day bed frame and get the mattress off the floor. I actually hemmed the curtains, we've been here almost a year and I finally did it. 

This space still needs a little work, but it is a vast improvement over the space before. Thanks for letting me show you around. Let me know what you think!


September 21, 2014

Bench

I made a bench! We have a really great little covered back porch, and ever since we moved in I've been thinking it would be nice to have a bench for sitting out on our porch with coffee in the morning or a cocktail in the afternoon.

On the side of the house is a big pile of old 2x4s and other wood. I used these, we own a chop saw, a drill and I borrowed a skill saw from the SE Portland Tool Library, so this project ended up only costing me about $15 for the cost of screws.
Giant pile of old wood on the side of our house
I started with a plan from Ana White. But because I was working with the wood I had I ended up making quite a few changes and my bench ended up being a lot “chunkier” than the original.

I was able to cut the back pieces at an angle using a skill saw. I tried to rip 2x4s in half but since I don't have sawhorses it didn't really work. All other cuts where made with the chop saw.

My work space in the back yard
Sides dry-fitted together
I started this on a Sunday afternoon and got it nearly finished by that evening, but the battery in my drill died so I had to wait for the battery to re-charge. I manged to do most of it myself but I did press my husband into service to hold some boards while I screwed them together. If I had had a set of clamps I could have done it without him. 

Original back design dry-fitted 
Since I couldn't do the fancy x back of the original inspiration I figured I would do slats instead (see above) I went back to the hardware store for longer screws (the rest of the bench is built with 3' screws) but when I got home and started to drill my pilot holes (always drill pilot holes!) my drill bit was not long enough to go all the way through the top 2x4. So the design changed again. 


It took me a few more days after work to complete, but we've been enjoying this bench for a good part of the summer. It is still living in the back yard, but it will start raining soon and I'll move it to the porch. At some point I'll sand and stain it but for now it is nice and rustic. I need to make some pillows too, but that is a project for another day.  

Arm rest and seat supports in place
Seat slats added
I'm pretty proud of it!


July 19, 2014

Hexie update

Remember all the hexies I had prepped? Well here are all the ones I have sewn up so far. Not quite enough to make a quilt but its getting there. I've been working on them here and there when we go on road trips. 


Two Mabels and a Moneta


Have you tried Colette Patterns new knit patterns Mabel and Moneta? They are wonderful to sew and wear.
I was lucky enough to be a tester for the Mabel skirt and this black one is the one I made to test the pattern. So easy and simple! And super comfortable.


I had some issues with the tension of the double needle I used and the first time I wore it the hem popped. By the time I got around to fixing it I had thrown out all the knit scraps I had and I needed to test the tension before sewing the real thing. So I grabbed a t-shirt I never wear and used that, but then I had a great idea, make a skirt out of t-shirts I never wear!

Its got a polka dot lining!
My husband and I used to be in the same union and between the two of us we had about six union t-shirts. He is no longer in that union and doesn't ever wear the shirts, and I really only need one of them. So I cut them up! And made the longer version with the kick pleat in the back. I wore the skirt to a party with a bunch of activist friends and told them that I had made it out of t-shirts and they thought it would be fun to make political t-shirt skirts where you leave the graphic in place. That would be pretty awesome. A project for another day!

Here is the back with the kick pleat.
The Moneta Dress is amazing. I only have one, but I would like a closet full.
I bought the fabric and the pattern at the book launch party Colette hosted at Modern Domestic. The fabric is an organic cotton bamboo blend and it is absolutely dreamy.
The stripes are a little wonky around the waist. I’d like to take it apart and re-do it so they are a little tidier, but for now it works.


I’ll make a few changes the next time I make it up. the neckline is a little wide, my bra straps often show which is annoying when I want to wear this to work. And the waistline is a little low. I think next time I will chop an inch or two off the bodice so it hits me a little higher. Have you seen all the collar variations you can add to Moneta? I really want to make a three quarter sleeve length with the tie collar for fall. Possibly in a forest green. I think it would be really cute for work with boots.


These are both great patterns, and I can’t wait to show you my take their new pattern, the Myrtle.

Rainbow Quilt


So a few years ago the mother of one of my best friends was clearing out her sewing room and got rid of a ton of scraps. She gave them to me since I was quilting a lot at that time and she knew my budget was tight and figured I could use free fabric. Of course! I have used a ton of these scraps to make a few different quilts over the years and much of the fabric for my duffle came from these buckets.


But there was a real gem buried at the bottom of one, a nearly finished rainbow quilt. I have know for a while that it was there and really should get completed but I had other things taking up my time. This week I decided I needed to bring it closer to completion.


When I found it there were five pieces plus some strips for the border. A few of the outer pieces had part of the border attached but not all of the border was there. It looked like her original plan was to have the rainbow quilt and then a solid gray border and then a black and white checked outer border.


For now this is as far as I’m going to get, but I would like to finish the quilt the way my friend’s mom intended. I’ll have to find just the right piece of gray for the border. And any thoughts on what I should use for the back or binding?


I’m thinking this would make a really fun baby quilt so I’ll definitely need the back to be something on the darker side of things so that it can go on the ground and be a play-mat and not show too much dirt. Maybe the same gray that I find for the border?

May 16, 2014

Sunken Berry Cake (and mother's day)


This past weekend was Mother’s Day. I hope you all called your momma’s if you couldn't give her a big hug. I got to see my mom, my grandma and one of my aunties. Triple whammy. Plus my awesome cousin (and her dad, my dad and her boyfriend, lots of family!) We were having a big potluck lunch and I was asked to bring dessert. So I turned to one of the best cakes I know.


This cake is a standby, I make it all the time. It is my husband’s favorite cake and it is simple and foolproof. It’s great for simple dinner parties and family gatherings. Its what I call “an everyday cake” not too sweet or complicated, but still yummy and special.


I use what ever fruit is in season. The original recipe was written for grapes, but I have never made it with grapes. This weekend was a mix frozen marrion- and blueberries, but I've made it with persimmons, cranberries and rhubarb. All of them are amazing.


This recipe was originally written with All-purpose flour but I make it gluten free more often than not. I don’t bother to add xanthan gum when using GF flour and there are not ill-effects.


Ingredients
2 sticks butter, at room temp
1 1/4 cups sugar
3 Eggs, at room temp
zest from one lemon (or part of an orange, depending on the fruit you use)
1 tsp almond extract (I hardly ever have this on hand, I usually use vanilla, although I was out of even that this weekend and left it out entirely and it was fine)
1 Cup GF baking mix or AP flour
1 cup almond meal or finely ground toasted almonds (see note)
2 tsp baking powder
1-2 cups berries or seasonal fruit.
Powdered sugar for dusting


Directions:
1. Preheat oven to 350F. Butter/spray and flour (make sure to use GF if you are using it in the cake) a 9 inch spring form pan. (I didn't have a spring form for a long time and would make this in just a regular cake pan and it was fine.)
2. Cream together butter and sugar. Let the mixer go for 3-5 minutes so it gets nice and fluffy. Add eggs one at a time and mix in between each. Add zest and almond extract.
3. In a separate bowl, mix together almonds, flour and baking powder. Add to the butter, sugar, egg mixture, stir until just combined.
4. Spread into the pan, use a rubber scraper to smooth the top. Then distribute the fruit in an even layer over the top, pressing down just slightly.
5. Bake for 50-60 minutes until a toothpick comes out clean. Cool for about 10 minutes, then unmold from the pan to cool completely. Dust the top with powdered sugar, serve warm or at room temperature. Keep covered on the counter for 2-3 days (if it lasts that long) but tastes best on the day it is made.


Note on fruit: Any kind of berry is delicious in this and can go into the cake raw. When I have done rhubarb in the past I cooked it a little first, but it might be fine to just go in raw if it is cut up small and you don’t mind a little crunch. I’ve never done apple or pear but I imagine they are fine to go in raw. Persimmon needs some prep,(peel and mash two persimmons and mix with 1/2 tsp baking soda, let sit for 5 minute before adding to cake, decrease baking powder to 1 1/2 tsp) but is totally worth it when they are in season. Depending on the kind of fruit you use, orange zest might complement better, I do orange zest when I put cranberries in it, but it’s up to you.


Note on Almond meal: I use the Trader Joe’s “Just Almond Meal” because it is easy and cheap. If you don’t have a Trader Joe’s or you have a bunch of almonds you want to get rid of, grind them in the food processor until the biggest pieces are about 1/4 inch and everything else is much smaller. The cake will be a little rougher, but still yummy.


Happy baking!

May 6, 2014

I made a dutch baby

Note: I wrote this back in May and had it scheduled to post, but apparently Blogger didn't cooperate, so you are getting it now, but the mention of the weather is not accurate. 

Need a special and super easy breakfast? Make a dutch baby. This was the first one I made, but they will definitely become part of our regular weekend breakfast rotation. 


I used this recipe from the Kitchn. The great thing about a dutch baby is that all the ingredients get blended up and then have to sit for half an hour before it is baked. Which was just enough time to take my cup of coffee and walk up to the store to pick up powdered sugar, a lemon and raspberries for topping it. The walk was lovely, sprinkling but not raining and when I was at the store there was a little boy who was absolutely delighted by the automatic door. It was quite amusing to watch while waiting in the check out line. 
This was really yummy. The recipe says it serves 4-6, but I ended up eating nearly the whole thing my self and was still hungry. I will make this again, but I'll need to serve it with something else to make it a complete meal. Also, the raspberries where good, but they aren't quite in season. I can't wait until they are!

May 5, 2014

Cupcakes!

I had some dear friends (and former roommates) get married this past weekend. Their wedding was a group effort and my friend Megan and I helped out by making the cupcakes. This was a big project. They needed 120 cupcakes and wanted red velvet. I did some internet research and decided to go with Smitten Kitchen's recipe.
The bride picked up all the ingredients at Costco and I stopped at The Decorette Shop to get cupcake liners, boxes and piping tips.
We quadrupled the recipe, which meant that we had a lot of ingredients.


That is the biggest bag of powdered sugar I have ever seen. 
We knew we needed to quadruple the recipe to get the total number of cupcakes we needed, but because I don't have a commercial kitchen, we doubled the recipe first and did two batches. We were working with four cupcake pans and had to bake two batches for each doubled recipe.


The lovely Megan, measuring 4.5 cups of sugar
Dry ingredients, all mixed up
The wet ingredients look like bad halloween decorations
Me, all ready to add dry to wet.
I wasn't sure everything would fit in the kitchen aid, but it did, just barely
Ready for the oven!
Into the oven!
I was worried about baking so many at a time and having them come out uneven, but we were on such a time crunch that we didn't really have a choice. They came out fine. I also didn't notice much of a difference between the first batch and the second, even though we left it out and the leavening had started working. 

I didn't get a picture of the naked cupcakes all lined up on my dining room table, or the frosting process. At that point I just wanted to be done, and my hands were too sticky to hold the camera.  But here is the picture that I texted to the bride to assure her that she would have cupcakes for her wedding:
We ended up running out of liners and since it was 11 o'clock at night we couldn't run out to the store, we ended up making a cake as well. 

Here is what they looked like all set up at the wedding:
We made some paper decorations for the cakes, and the bride had some gold painted baskets for the cake table.
Megan and I with our handiwork (and in our wedding finery)